Color Management for 3DCG
Photoshop and Illustrator Color Settings
These steps will help you to achieve consistent color management in your 3DCG workflow. The settings for Photoshop and Illustrator are similar. Furthermore, it is possible to share Photoshop settings with Illustrator so you can work without worrying about setup errors.
Photoshop Settings
Step 1
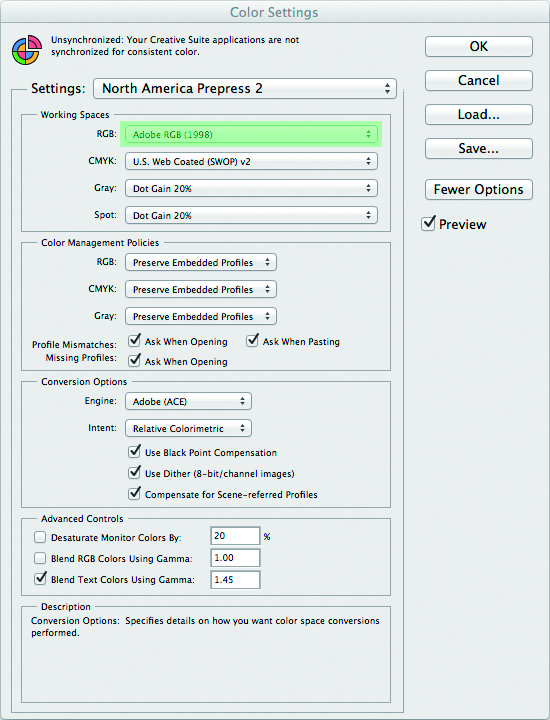
Select the color profile for Working Spaces/RGB under Color Settings. Match other settings as shown in the below image.

Step 2
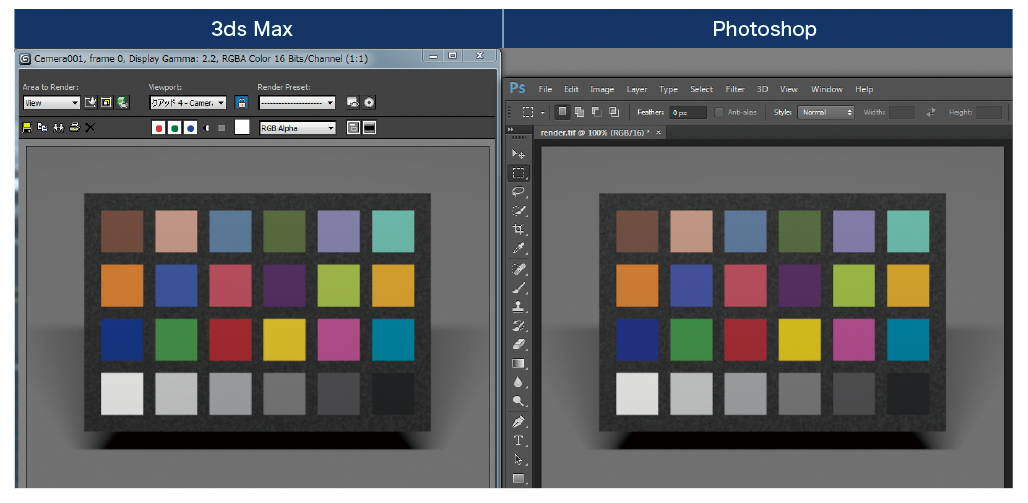
When rendering an image, a simulation will automatically display the colors set for Working Profile. Check that the colors match between Photoshop and your 3DCG application. If the colors don't match, either the target profile for your monitor and working profile are different or the display quality or adjustment accuracy of the monitor is too low.

Illustrator Settings
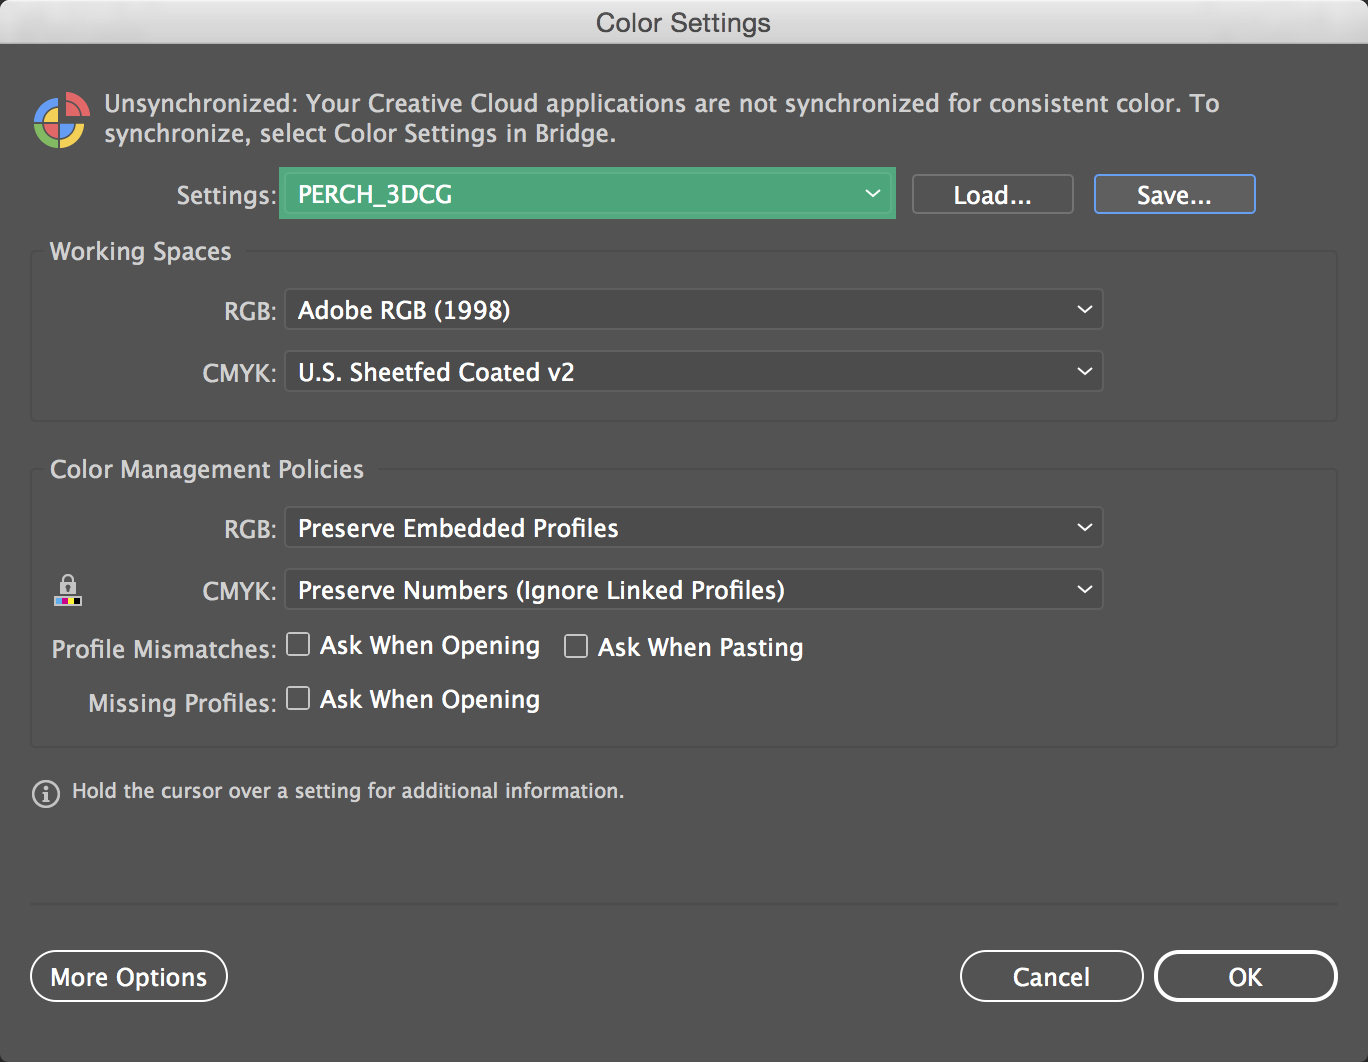
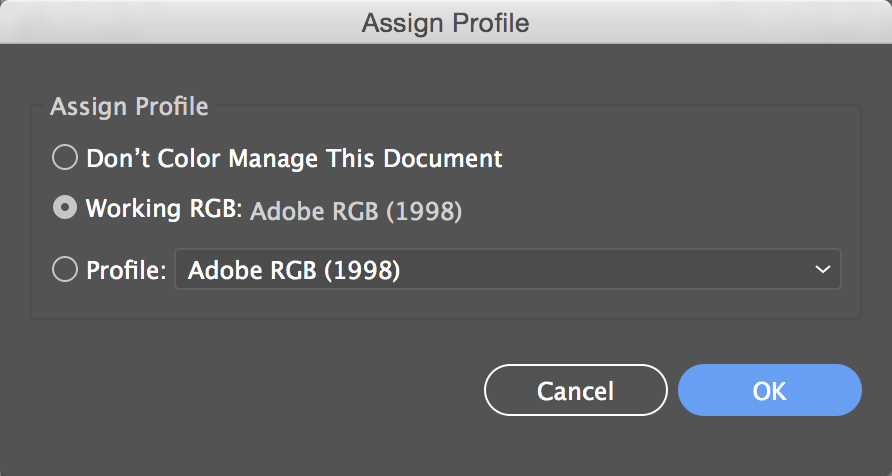
The steps are the same as above. Select the color profile for Working Spaces/RGB under Color Settings and match the other settings as shown in the below image. With your file open, go to Edit > Profile Settings and select your profile. Note that unlike Photoshop, there is no Profile Conversion setting so color conversion is not available.
|
|
|
|


